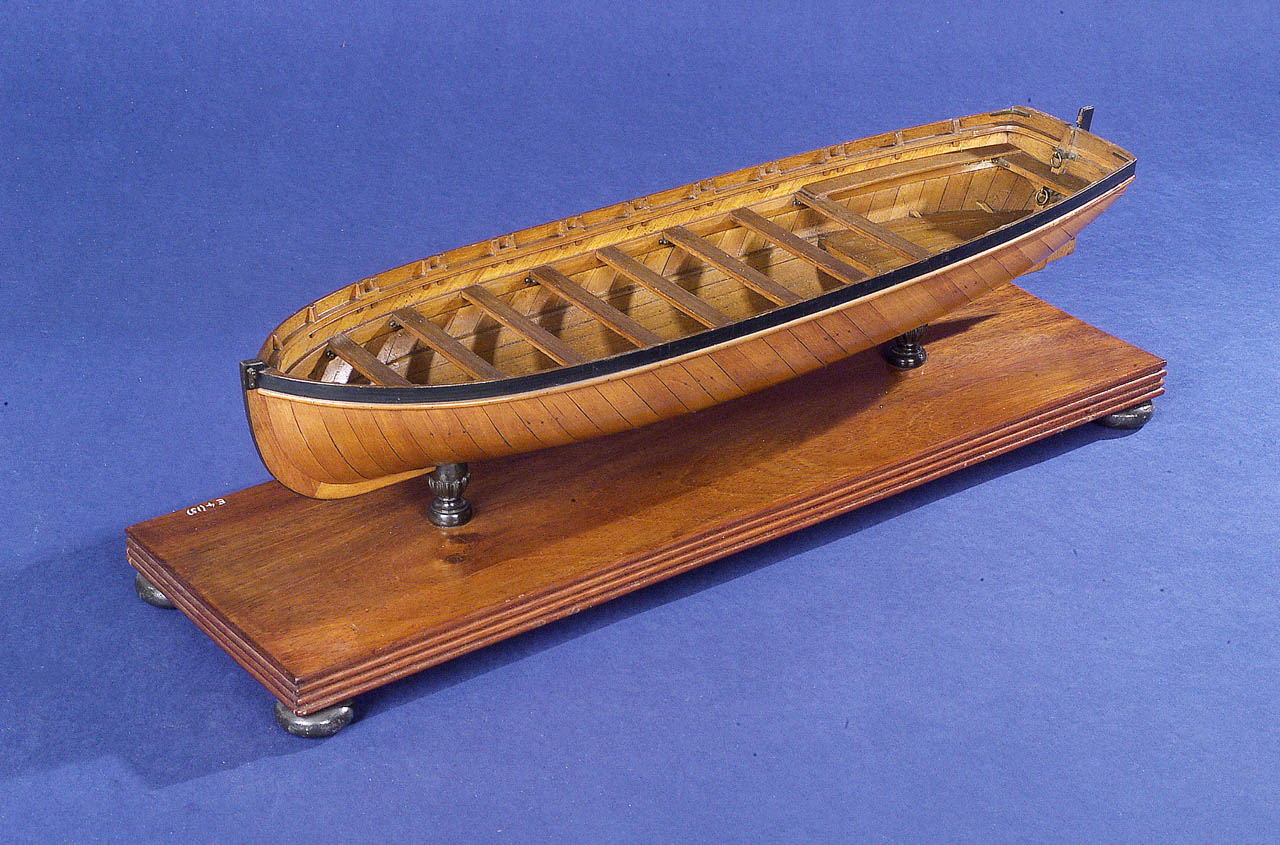
Diagonal planking is not something that is seen regularly on ship models or on period ships for that matter. It was certainly used on small vessels and even on some frigate sized ships from the late 17 hundreds. The Greenwich Maritime museum has some marvelous models of small boats showing this diagonal plank type of construction.
[GDC_row]
[GDC_column size=”half”]

[/GDC_column]
[GDC_column size=”half”]
[/GDC_column]
[/GDC_row]
These two photos show one of the diagonal planked models from the Greenwich Maritime Museum collection. This model is one in a series of ten open boat models dated 1838, most of which are diagonal planked.
Diagonal planking (commonly called cold moulding today) is still in regular use today by small boat builders as it can give a very light yet very strong hull. Here in Australia it has been used to build the tradition surf boats for many years. A search of the internet for diagonal planking or cold moulding will show quite a variety of vessel built with this method of planking.
Diagonal Plank Build
I have chosen to construct my diagonal planked model at 1:9 scale. This gives a model twice as long as our clinker and carvel built models. The processes and techniques that I will be using to construct this model could still be used to build a smaller or larger model but you would have to take into account the sizes of materials to be used. Diagonal plank construction requires a fair bit of support to help maintain the shape of the hull during construction so I will use all of the frames on the drawing for this model. The planking will be out of Radiata Pine which is readily available from most hardware stores. I am going to attempt to use quite thin therefore flexible planks for this model so that I don’t have to pre-bend each plank before it is fitted.
[GDC_row]
[GDC_column size=”half”]
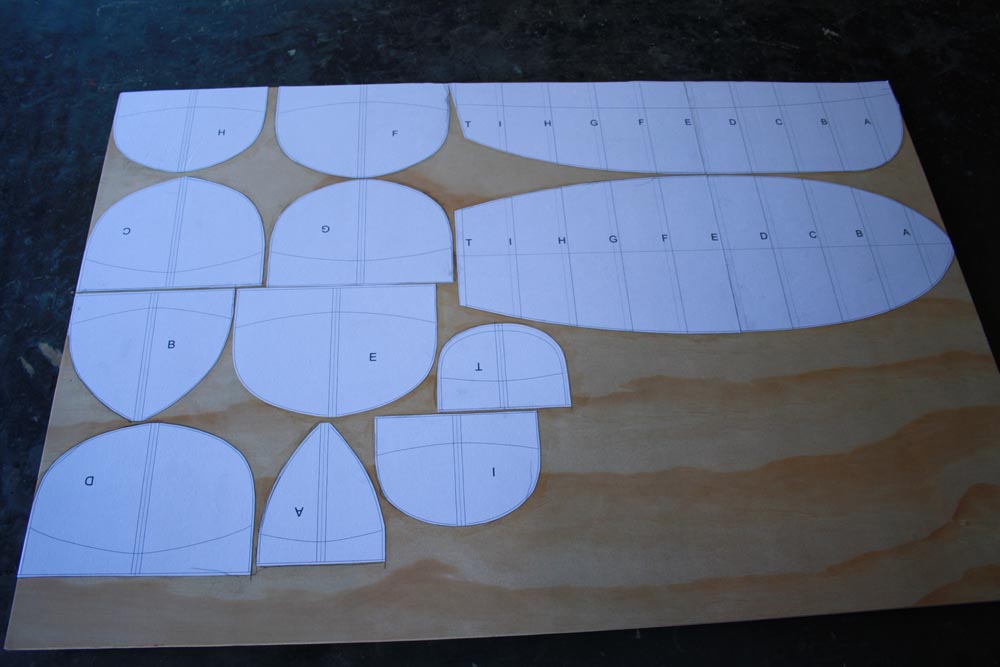
The drawings were printed out on A4 sheets of paper. The paper templates of the frames and keel etc were cut out and glued onto a sheet of plywood. I have used a 900mm x 600mm sheet of 7mm ply from Bunnings for the frames and keel.
[/GDC_column]
[GDC_column size=”half”]
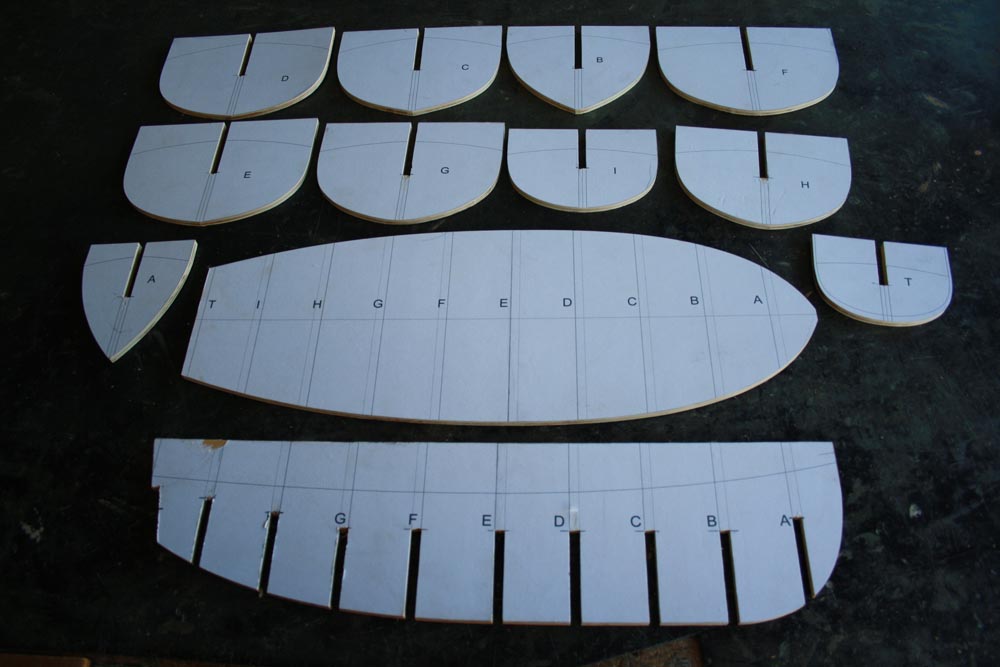 All of the parts were cut out. Again this can be done with hand tools or power tools depending on what you have available. My preference is to use my bandsaw to cut all parts just oversize then use a disc sander to bring each part down to finished size.
[/GDC_column]
[/GDC_row]
[GDC_row]
[GDC_column size=”half”]
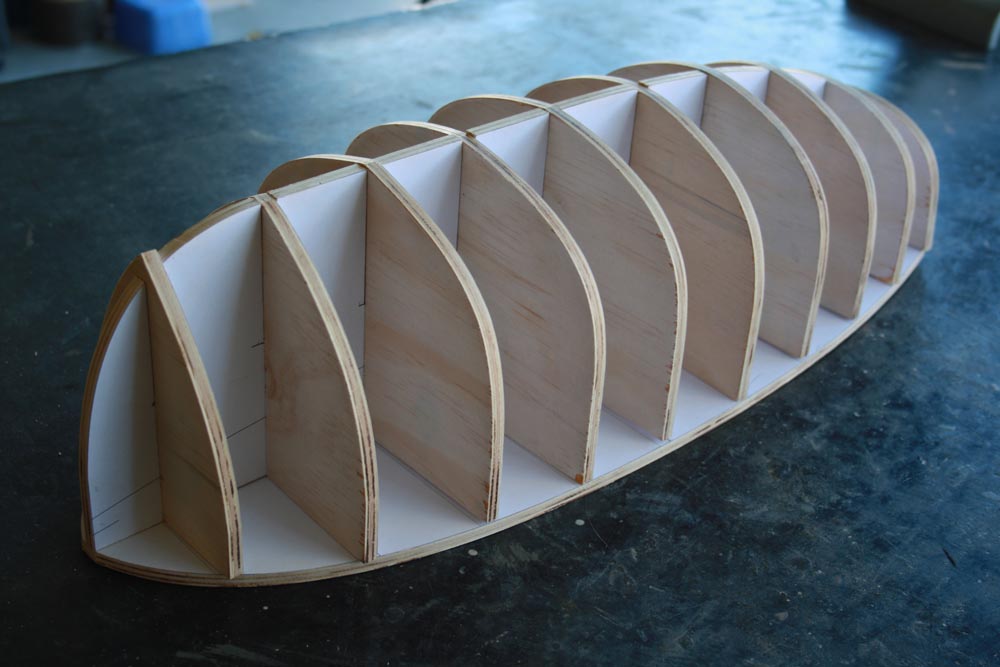
The base, keel and frames were all glued together ensuring that everything is straight and even. I used masking tape to hold things in place while the glue dried.
[/GDC_column]
[GDC_column size=”half”]
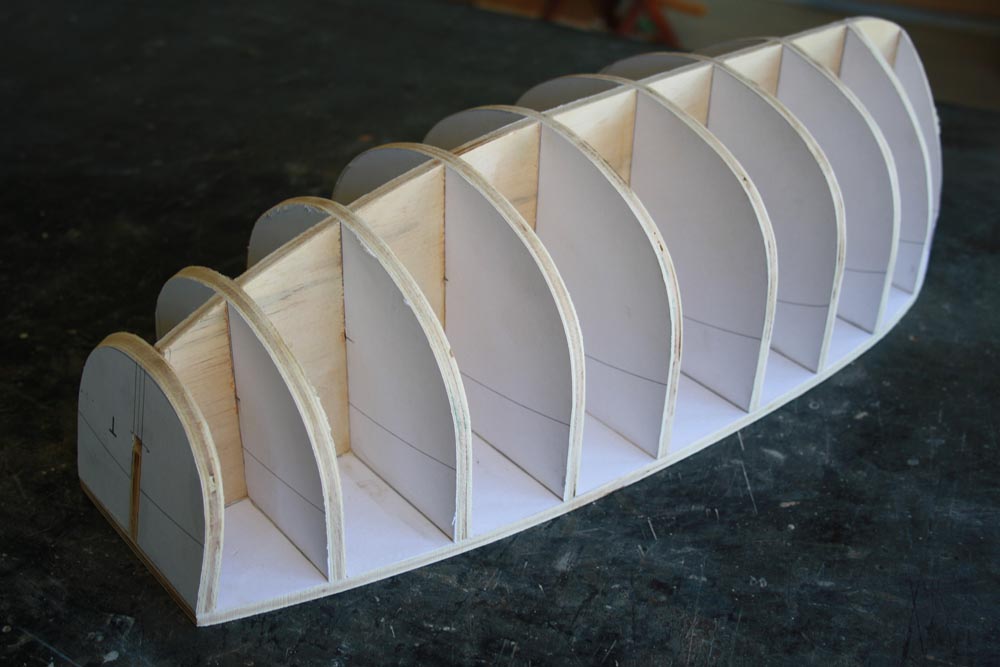
The edges of all of the frames were sanded to ensure a smooth transition from one frame to the next. This can be done with power tools or hand tools. You will probably find though that it will have to be finished off with some sandpaper on a long piece of timber to ensure that all high spots are removed.
[/GDC_column]
[/GDC_row]
[GDC_row]
[GDC_column size=”half”]
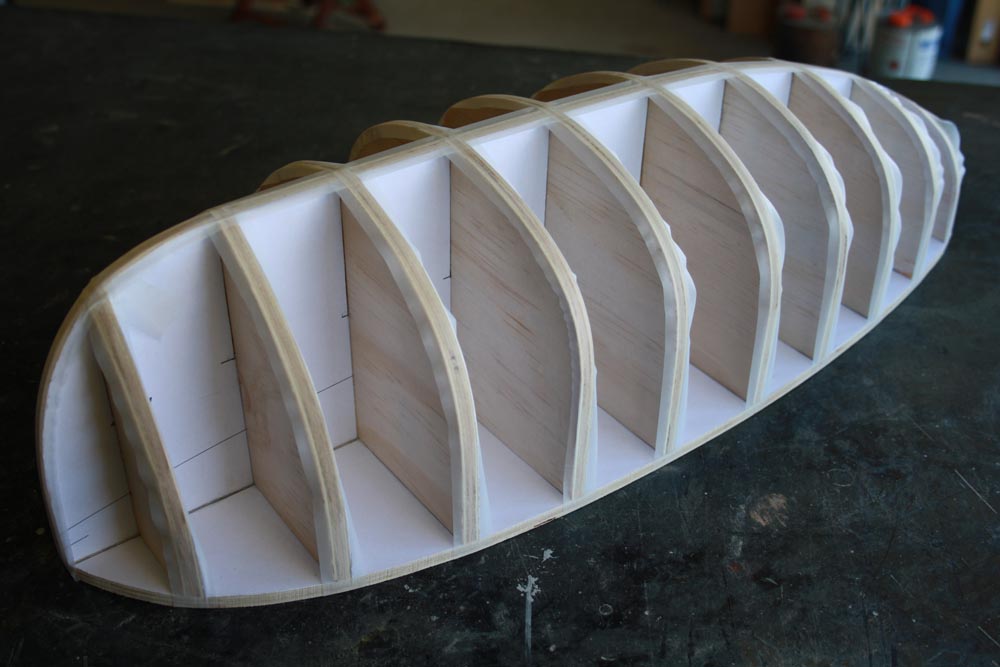
One of the things that we need to keep in mind when building an open boat is that the frames will not be attached to the model after it is planked. To help out with this I have used a plastic sticky tape on the edges of the frames and keel to help stop the planking from sticking to the wooden frames. In this case it seemed to work too well and it became difficult to get things to hold their shape because the glue would not stick to the tape at all. If I were to do the same model again I would use masking tape along the edges instead.
[/GDC_column]
[GDC_column size=”half”]
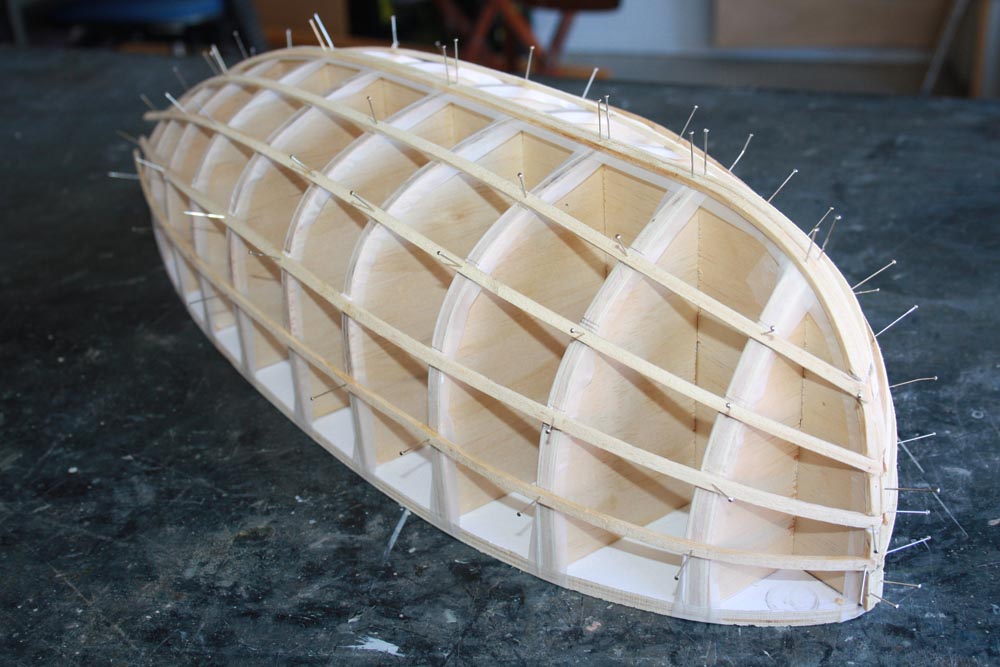
I glued five stringers to each side to the hull. The stingers were evenly spaced from the centreline to the hulls upper edge. Each stringer should lay as naturally as possible from end to end across each frame. The stringers were made from pine and were about 6mm x 3mm. Again if I was to build this again I would probably use more stringers in-between the ones in the photo giving nine stringers per side. Note that the ends of the stringers are notched into the centerline stringers at the bow.
[/GDC_column]
[/GDC_row]
[GDC_row]
[GDC_column size=”half”]
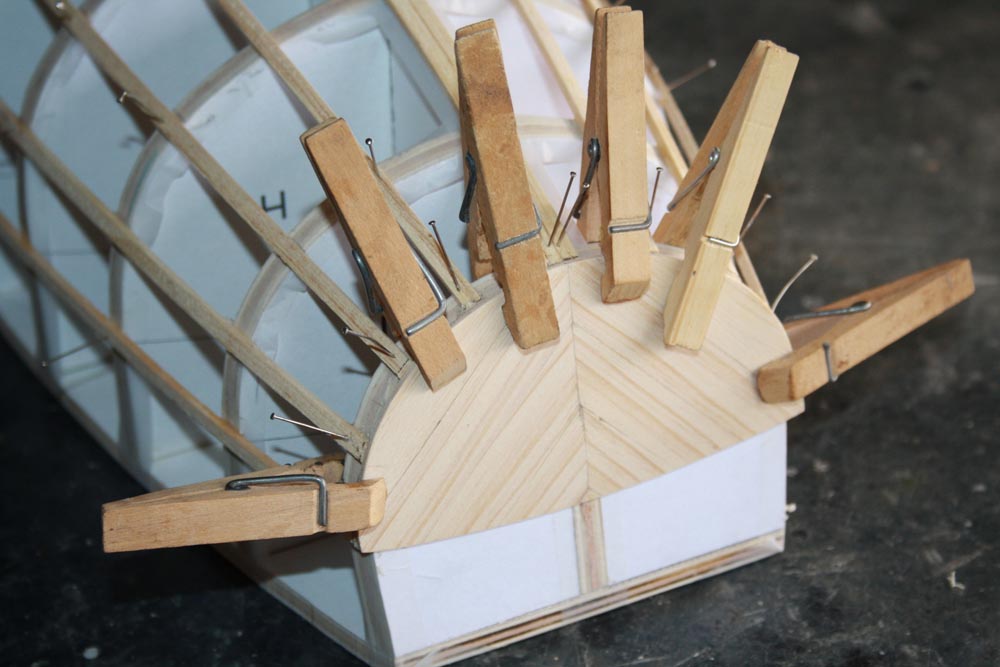
Before planking starts we need to make a transom. I made my transom from two layers of the hull planks. The first layer was vertical strips glued edge to edge. With the second layer I got a little fancy and created the mirror pattern along the center line with planks at 45 degrees. The transom was constructed off the model and was only glued on after it had bee shaped. The transom was only glued to the ends of the stringers.
[/GDC_column]
[GDC_column size=”half”]
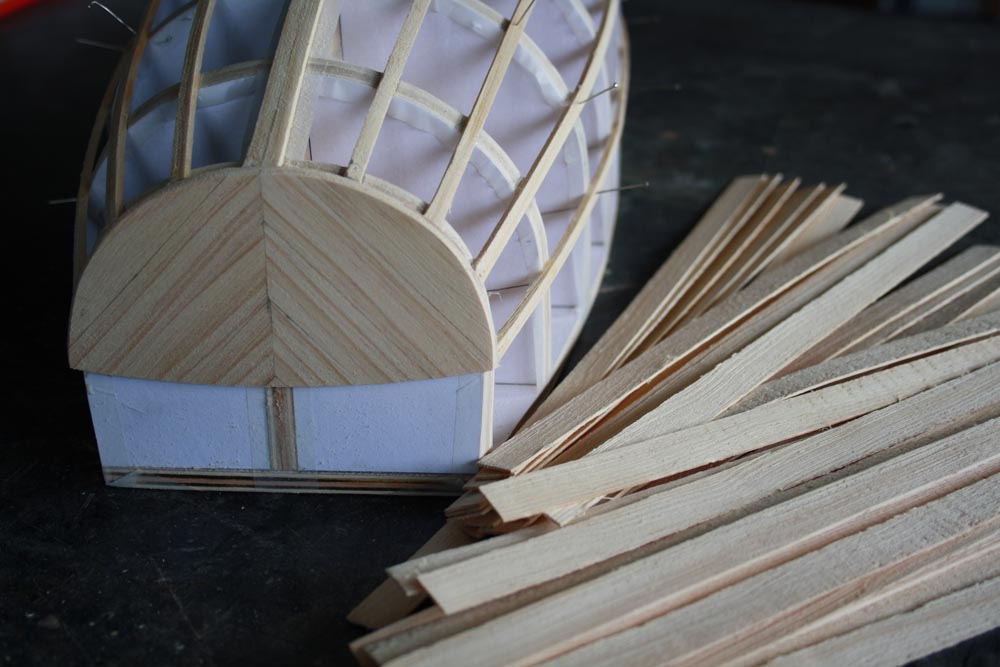
The planks for this model were cut from pine and were finished to a size of 1.1mm thick x 14mm wide x 270mm long. These planks are very flexible and will not require soaking prior to fitment. Remember that with this method of double diagonal planking that we will need enough planks for two layers.
[/GDC_column]
[/GDC_row]
[GDC_row]
[GDC_column size=”half”]
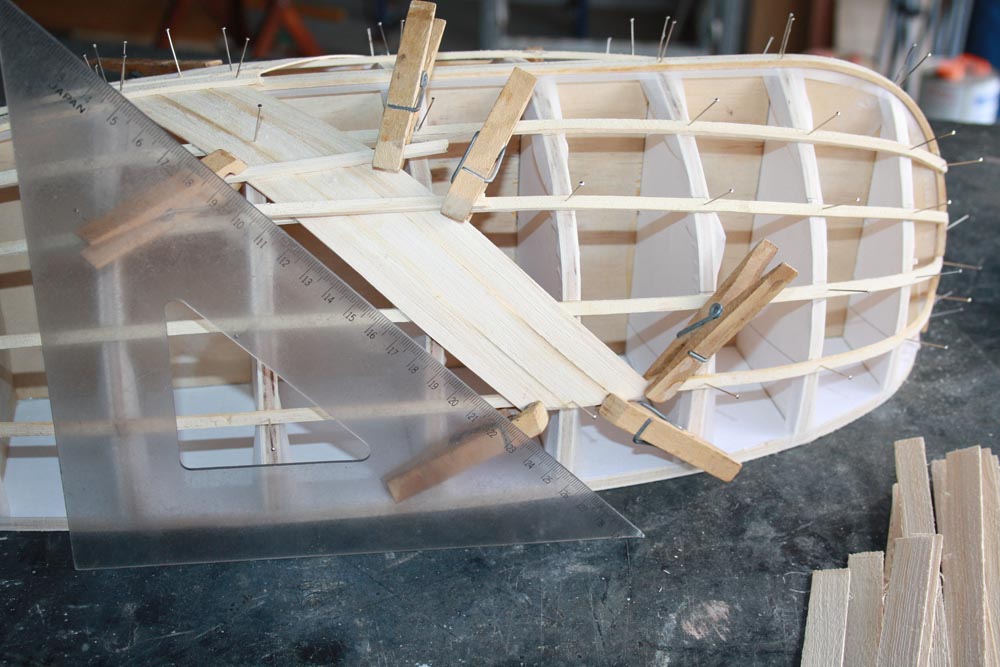
So now it is time to start planking. Because these planks are quite thin, they will bend easily over the stringers. We want to lay the first few planks at 45 degrees some where near the center of the hull. I would recommend laying three or four planks on one side then lay the same number on the opposite side. Each plank is glued to each stringer and it is also edge glued to the plank beside it. Clamping the planks in place while the glue dries can be done with pegs, clamps, pins, tape or what even else works for you.
[/GDC_column]
[GDC_column size=”half”]
Continue adding planks to each side both towards the front and towards the rear of the model. Each plank will generally require a little bit of tapering on both ends to ensure a good fit. You will find that most planks are wider in the center than they are on the ends. We also need to try to maintain the 45 degree angle as we add our planks.
[/GDC_column]
[/GDC_row]
[GDC_row]
[GDC_column size=”half”]
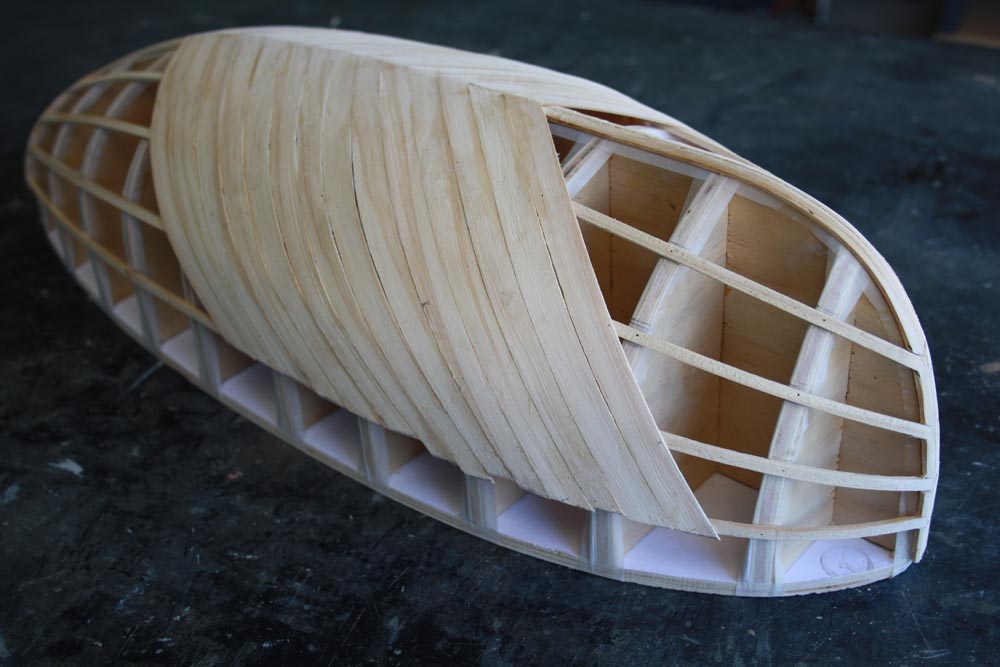
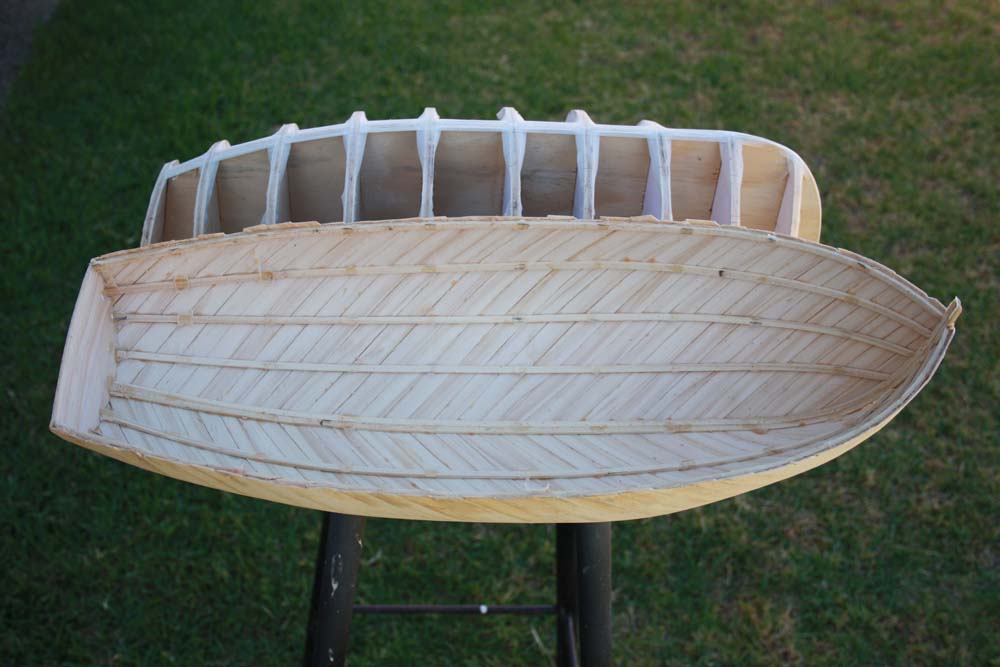
 Continue your planking forward and back until you have the entire first layer fitted. Once it is all planked give the whole thing a bit of a sand to take off any high spots.
[/GDC_column]
[GDC_column size=”half”]
 Start the second layer of planking in the middle of the model again. This time the planks should be at 45degrees again but in the opposite direction to the first layer. Just like the first layer, fit a few planks to each side of the model then continue to add planks towards the front and back. This time remember to glue the planks to the first layer as well as to the edge of each other.
[/GDC_column]
[/GDC_row]
[GDC_row]
[GDC_column size=”half”]
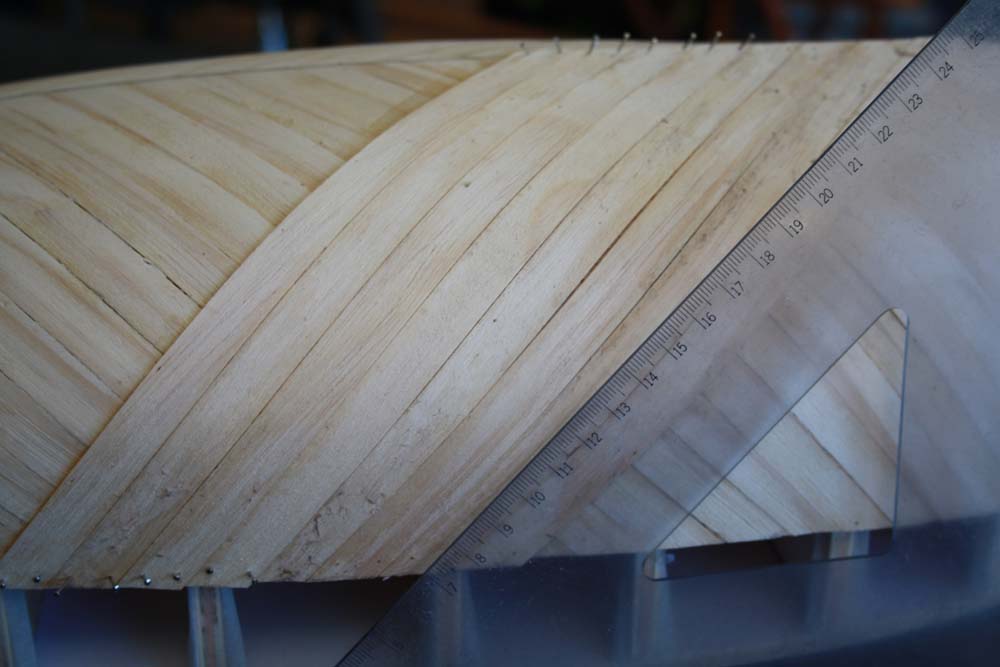
 Continue planking until both sides of the hull are covered in two layers of planks. As with the first layer, many of the planks will need tapering a little to get them to fit properly.
[/GDC_column]
[GDC_column size=”half”]
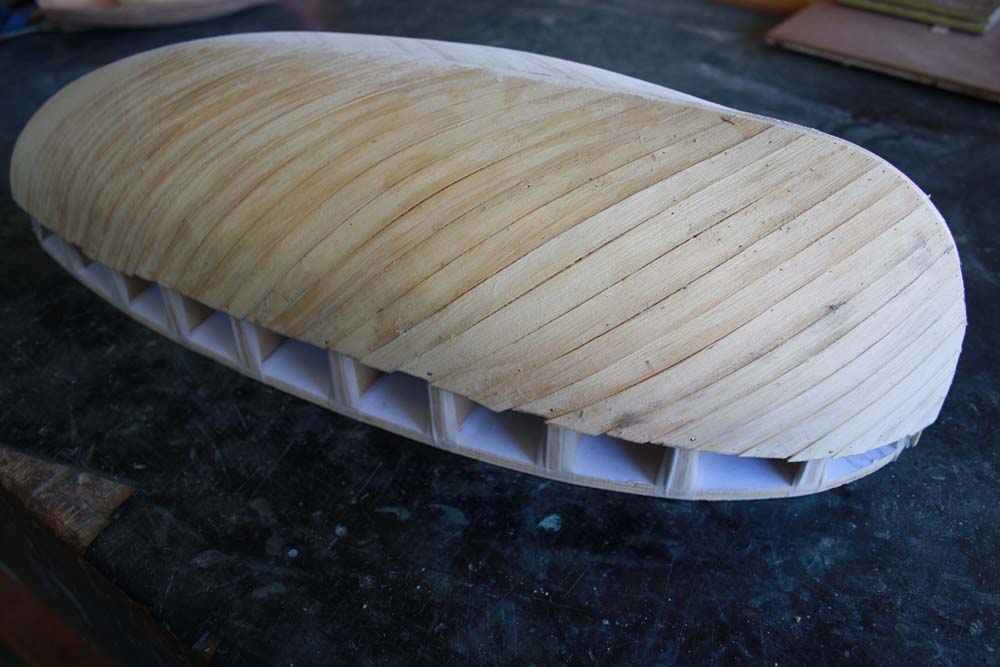
 Once all of the planks have been fitted the hull will require a good sand with a course sandpaper to smooth out the lumps and bumps created by laying all of the planks. Remember that the planks are relatively thin so only sand off what is necessary.
[/GDC_column]
[/GDC_row]
[GDC_row]
[GDC_column size=”half”]
 After the course sanding use a finer grade of sand paper to get a smooth hull all over.
[/GDC_column]
[GDC_column size=”half”]
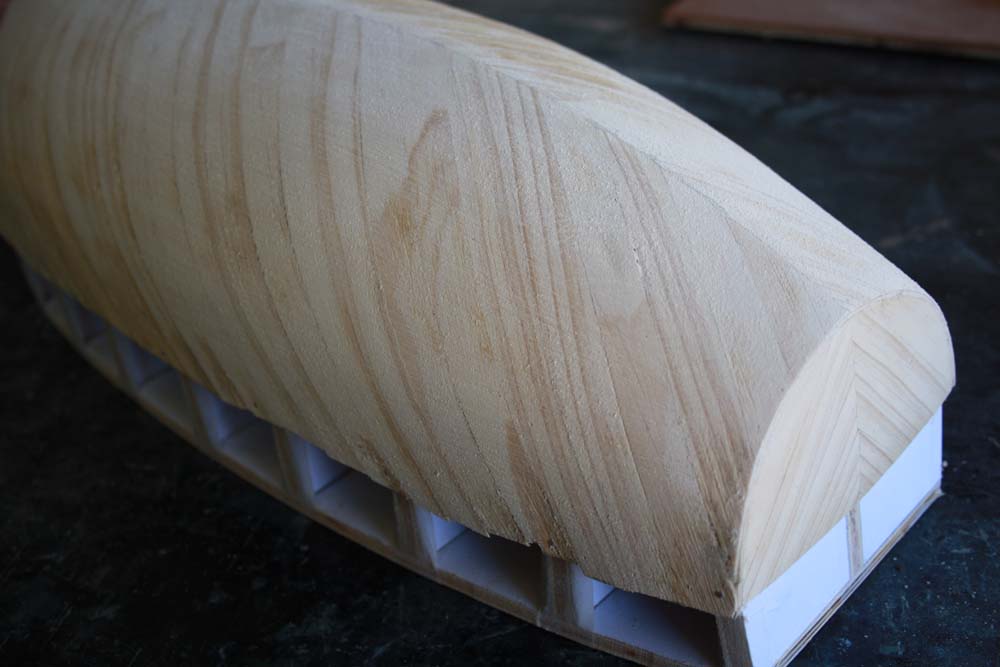
 The hull can now be lifted off the frames. In this case, because of the type of sticky tape that was used, the hull almost fell off. Usually there will be a couple of places where some limited force is needed to separate the two.
[/GDC_column]
[/GDC_row]
[GDC_row]
[GDC_column size=”half”]

A keel, skeg and stem post were cut to shape.
[/GDC_column]
[GDC_column size=”half”]
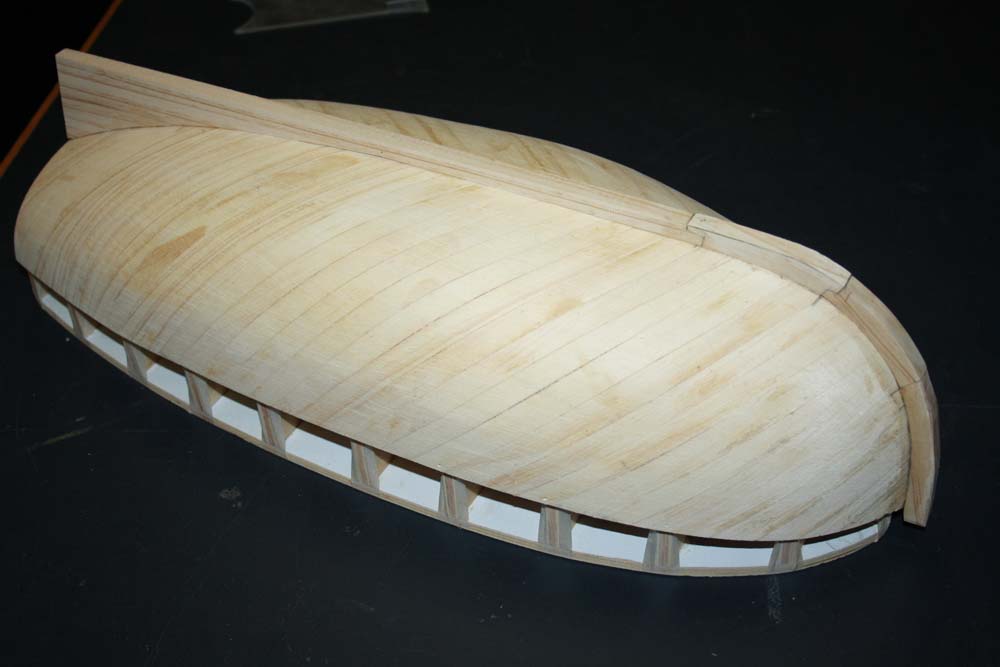
Keel and stem pieces were glued in place. The whole model was then sanded. I added additional stringers inside the hull and then added the gunnel timbers.
[/GDC_column]
[/GDC_row]
[GDC_row]
[GDC_column size=”half”]

The hull was stained and painted. It was then given a couple of coats of clear satin varnish.
[/GDC_column]
[GDC_column size=”half”]
.
[/GDC_column]
[/GDC_row]
This content is restricted to CMSS financial members. If you are an existing user, please log in. If you are a CMSS financial member and wish to register you may do so below.